Sunday, October 6, 2013

Creating a swimming Pool/Fountain Mural


Interesting, I was approached to do a mural for an outdoor fountain...  At first, I was a little resistant on taking on such an endeavor, but, the more I thought of it, I really wanted to accept the challenge, and of course the financial rewards of such an endeavor are always favorable..(hey, a commission is a commission!)

The project was completed, the client is very excited, and I'm pleased with the results. So I thought I would share with you on how it was done.

Firstly, the client wished to duplicate an outdoor marble picnic table top (Fig. A) that they had purchased in Italy.  Comps were submitted on how the art would look within the base on the fountain were submittd and amended by the client till a desired result was settled.
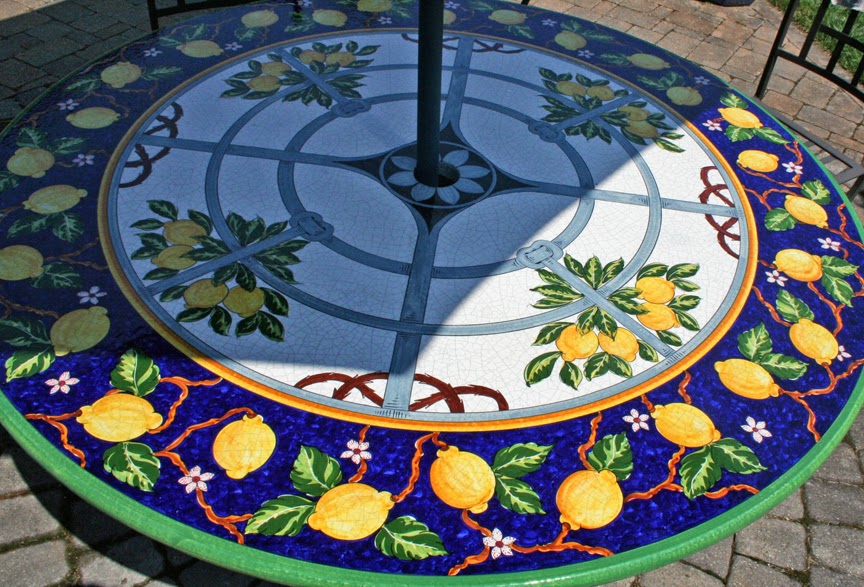
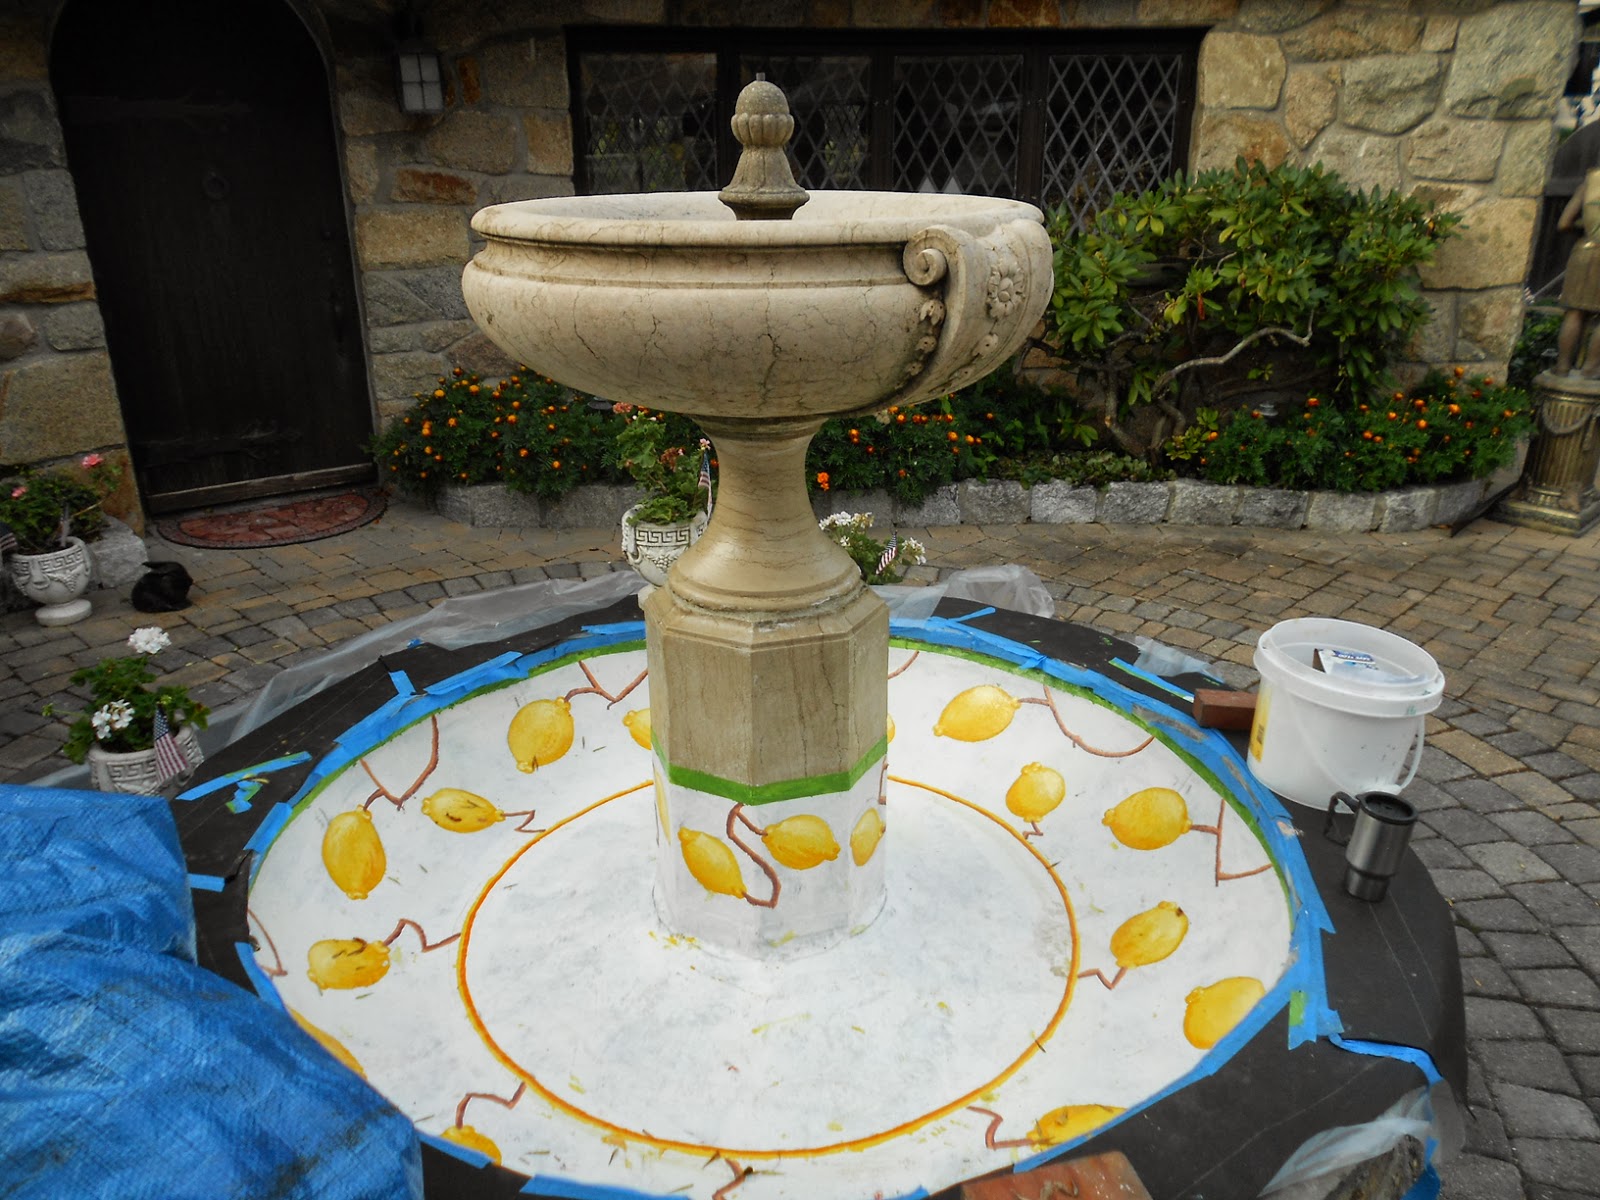
A. The Original table to base the design.

My first burning question, was what kind of paint to use. Since this was being used under water, I was apprehensive about any kind oil/acrylic normal household product.  I was thinking of an automotive finish as well.  But ultimately, why not use a swimming pool paint.  Afterall, thats always under water.  A quick research on the internet, found an number of suppliers available... but 98% offered only shades of blue, aquamarine,
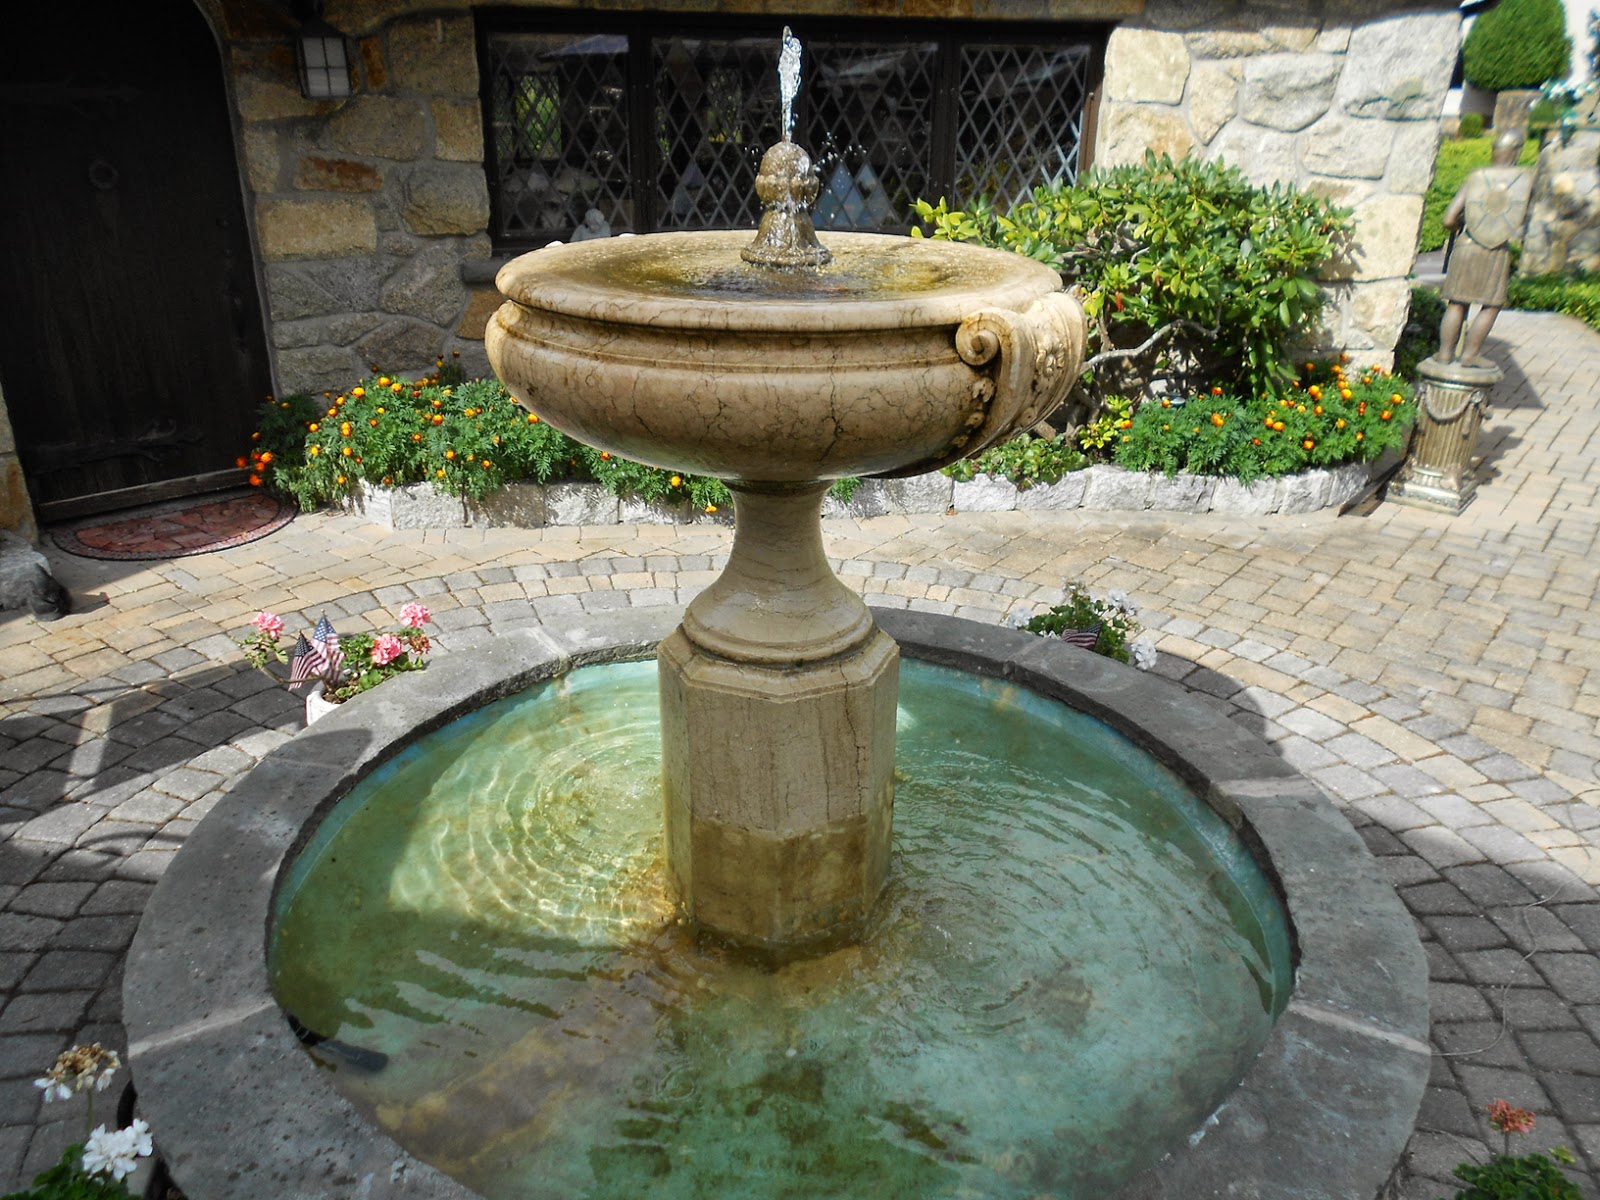
B. The fountain, note the
"roughness" of the base to be painted.
white and black. That certainly would not do.

Finally, I stumbled on a company called Top Secret coatings, and sure enough, they had swimming pool paint, with a color chart of over 100 samples.  Reviewing my color comp and the original, I settled on a dark blue, yellow, orange, red, green, white and a primer.. plus cleaning agents, and thinner. This way I had the basic colors to create my palette.  I picked up a bunch of small zip lock tubs with locking lids, so that I could mix my paints, then still have some down the line, if I needed more.

Production begins..
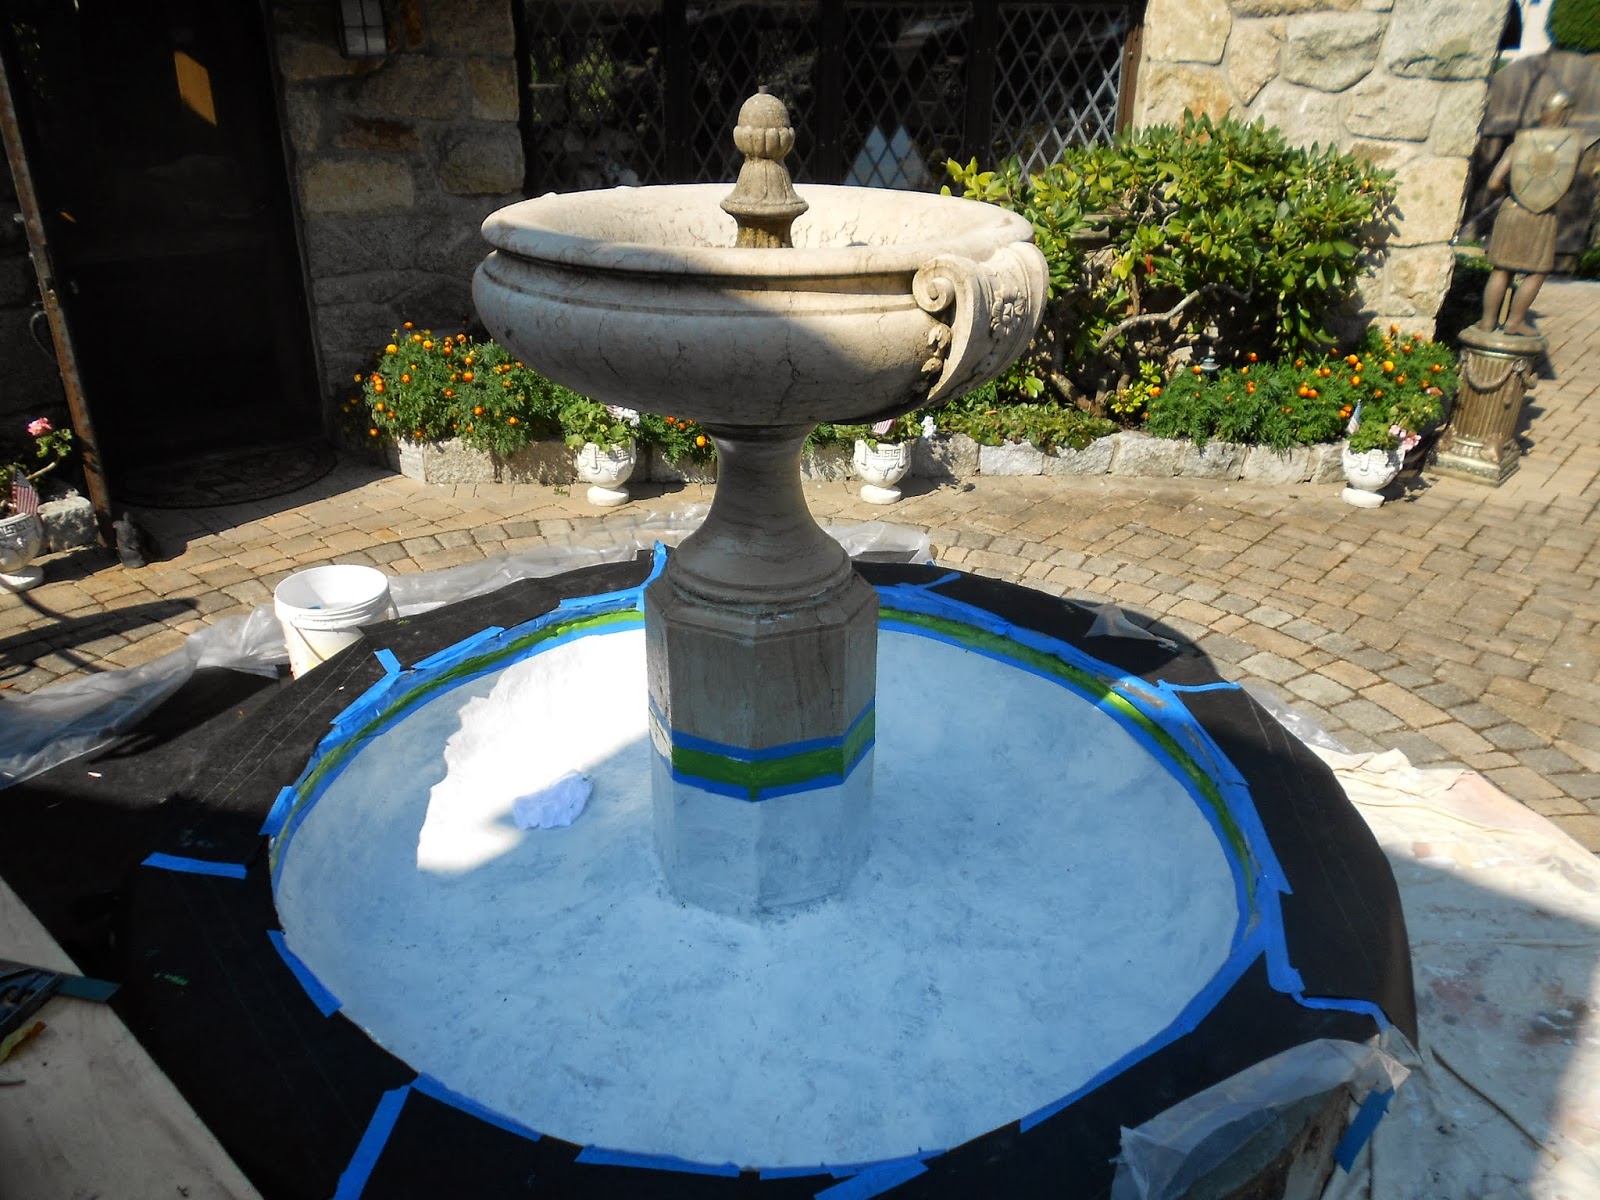
C. Masked off, washed and primed, with
green rim masked and painted.


The fountain base of course was drained and let to dry.. It had recently been repaired, so that a whole new layer of fiberglass was adhered over the old concrete base. (Fig.B)  Problem, was that it was rough...can't do anything about it, just work with it.  The base firstly was cleaned throughly with the agent supplied, dried then lightly sanded.  Knowing that the paint was semi-transparent, the discolored surface was primed to give a good white base, and the proper adhesion for the paint. (Fig. C)

The first painting/drawing steps was to create the green rim around the brim... that was easy, just measure down for thetop, and mask it off, and paint. From there it gets more complicated.
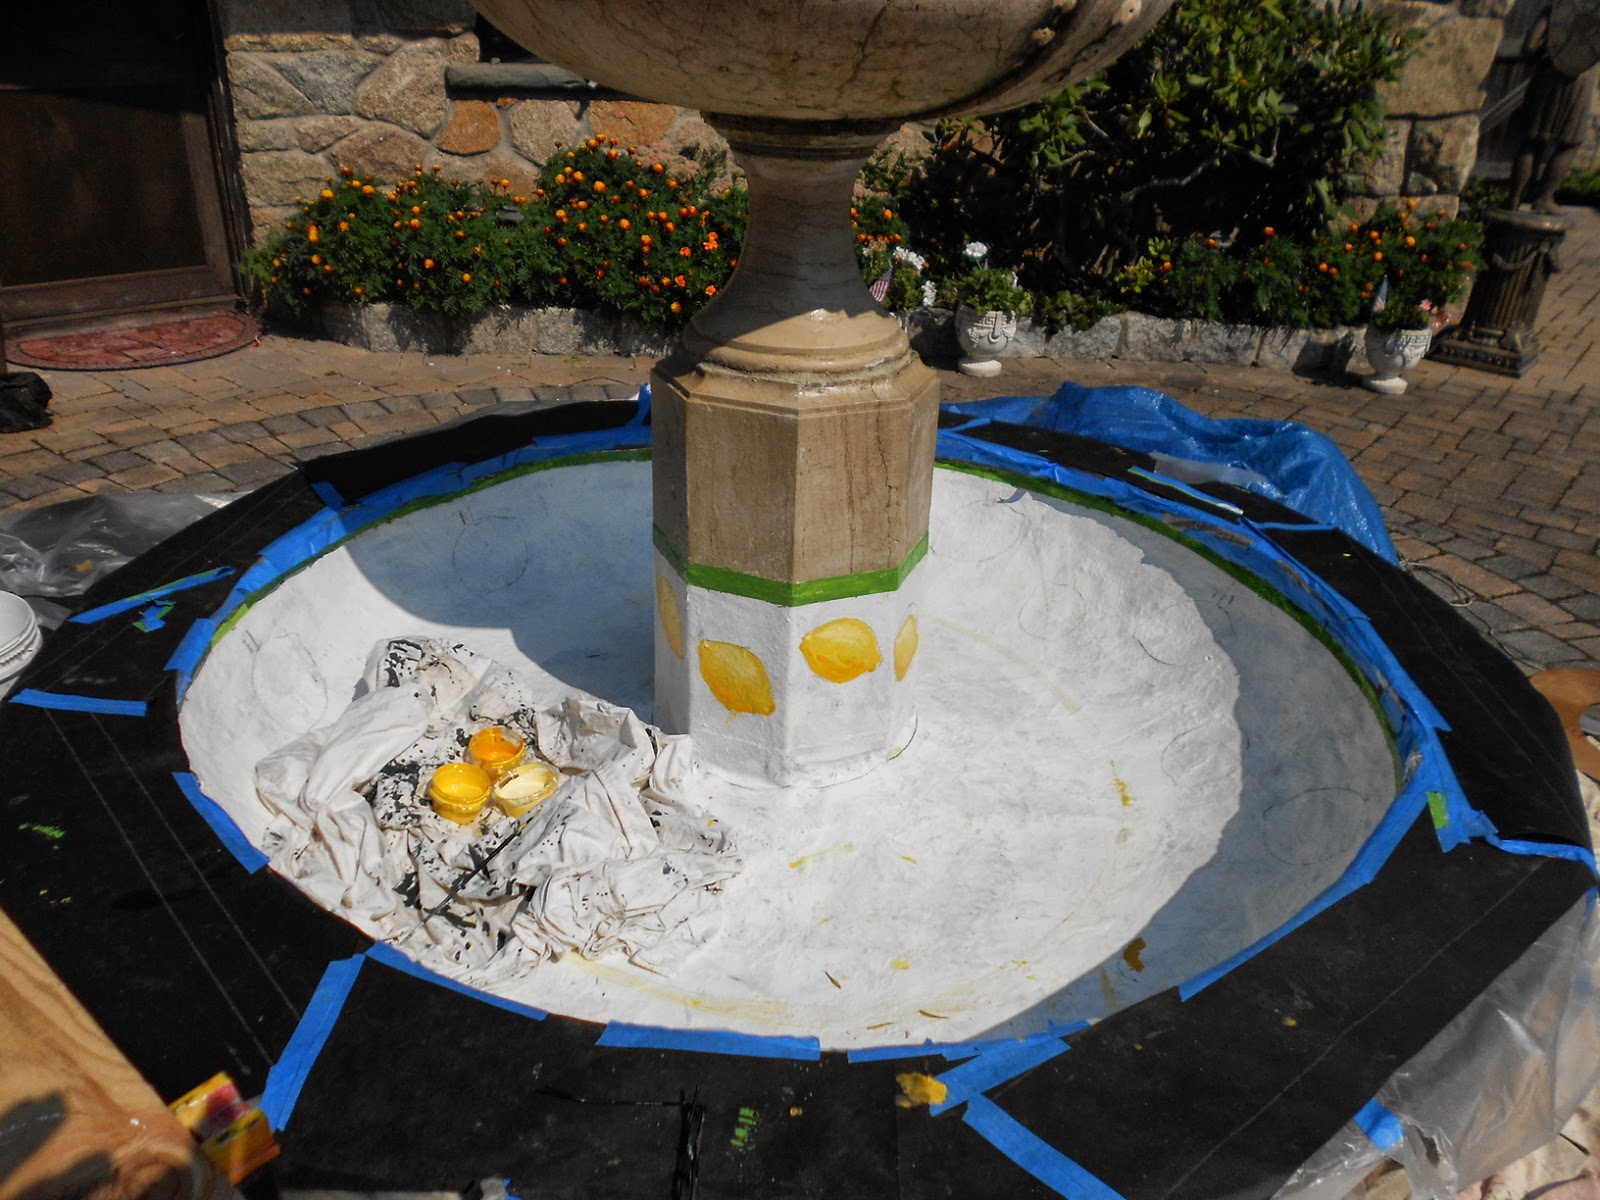
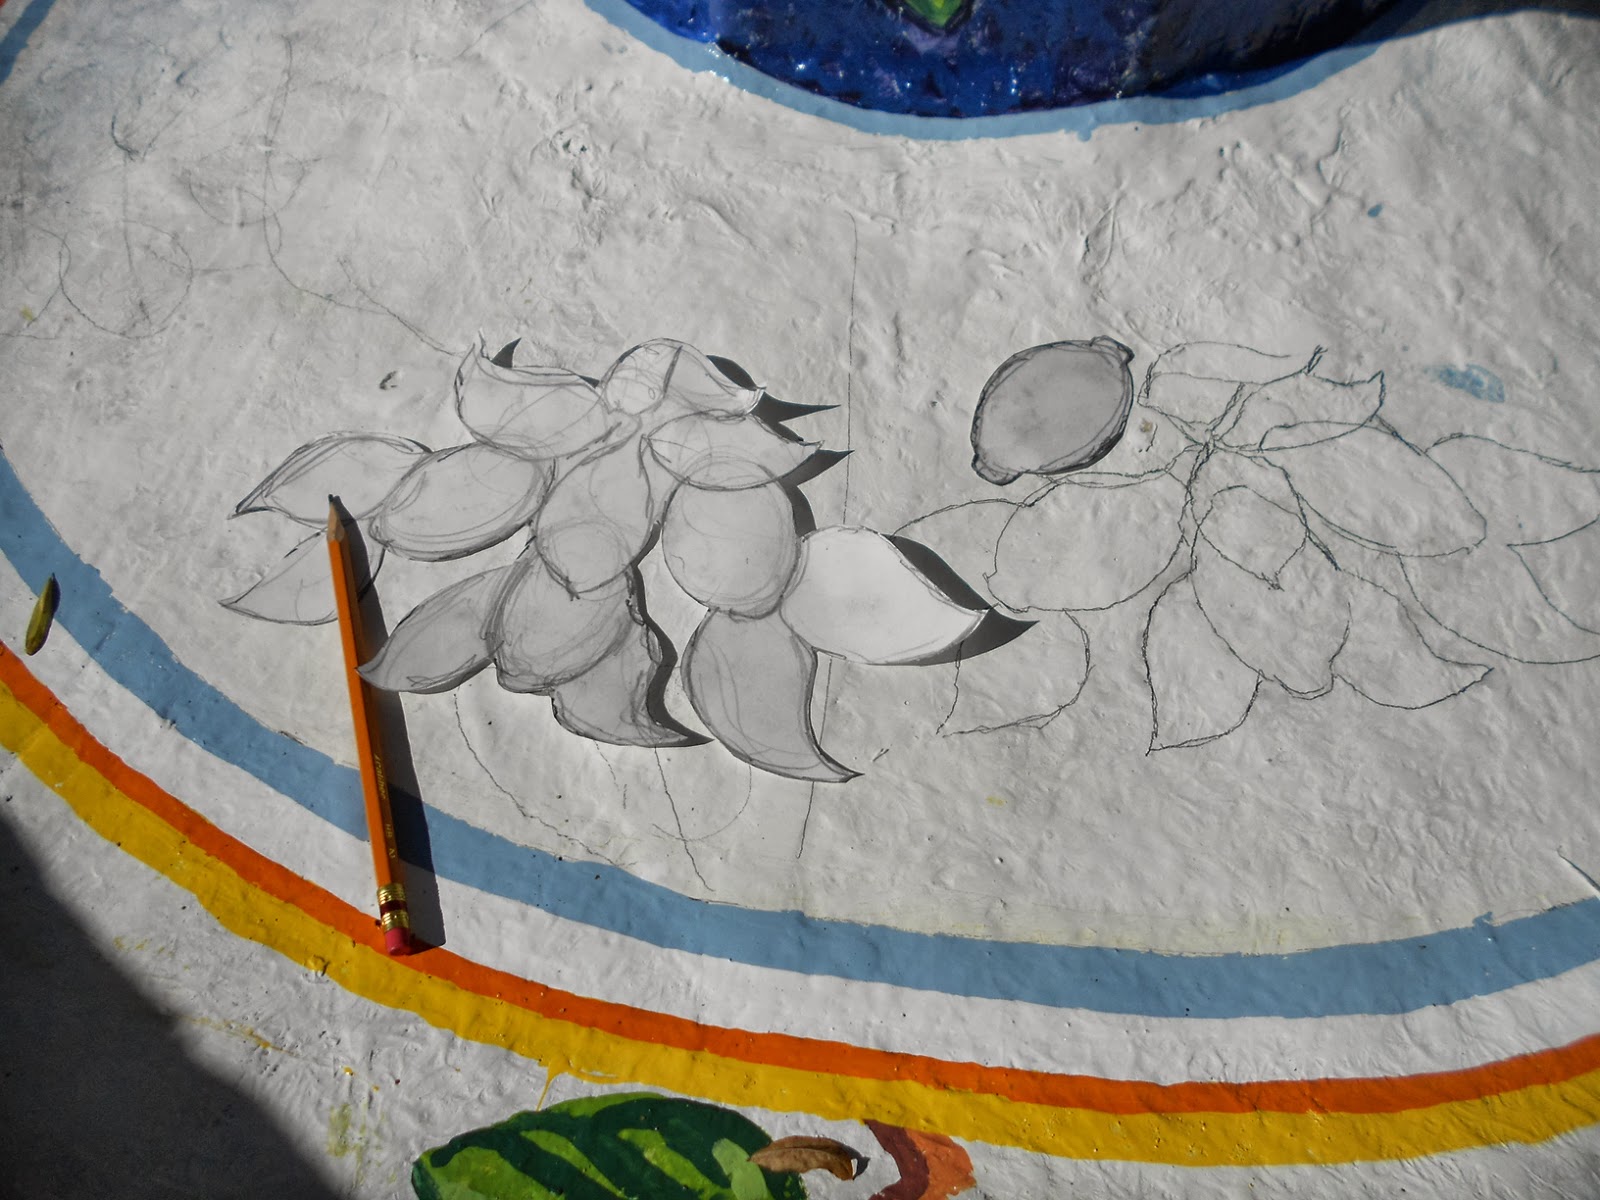
D. The first set of lemons were drawn and
evenly spaced and painted.

The large lemons needed to be evenly space, so it was back to 7th grade math, and figure out the circumference of the fountain, then evenly space the locations, by making a die, an tracing it onto the base.. (Fig. D) and proceed to too paint each. (Fig. E, F) Knowing the consistency of the paint as well, I knew, that I had to start with lights, and work into my darks.. there was no way the light paint would cover a dark, so all detail had to be painted first.

You'll notice, that there is a circle around the base. At first I figured this out by measuring a certain amount down the top  "Lid" and swung my circle. After painting it.. I knew it was wrong, too much inconsistency ( stepping back and eyeballing it, it was definitely a little too egg-shaped..)  It was time to prime that over and rethink the circle out. Since I couldn't access the centerpoint of the circle (the fountain was in the way) how can I get a clean circle...I had one of those aha! moments, and created a collar. Grabbing a larg cardboard panel from the garage ( I can't throw away large carboard panels, way too many uses for them...especially for my mga that always likes to leave its mark on the floor after being driver more than two miles...)
E. The lemons completed
First , I drew an 18" (the fountain is a bit less than 18" diameter) circle on a sheet of cardboard with a compass, then a 24 inch circle around that and cut it out of the cardboard.  (Fig. I.) In essence I created a collar that popped around the center of the fountain, and was abled take all further measurements of that collar.  Worked out fine.

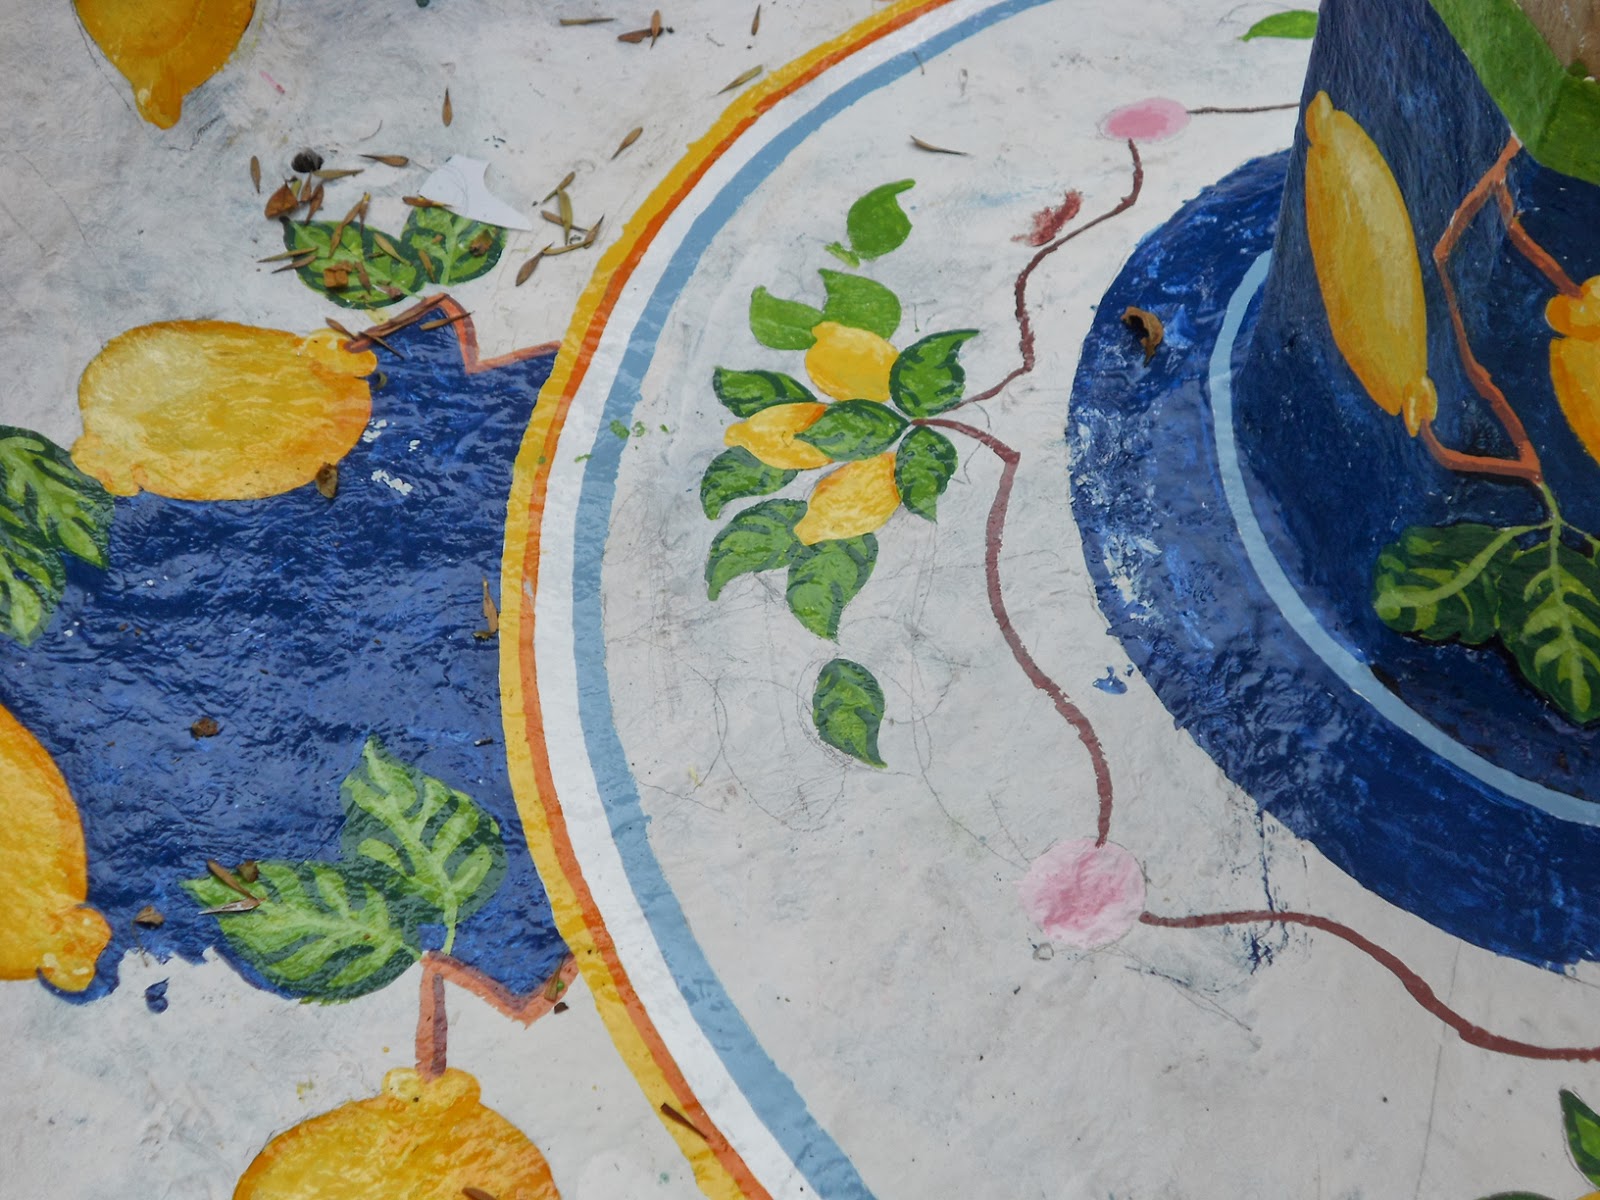
Further stencils were made for the interior lemons and leaves, (Fig. G) and they were evenly spaced around the fountain as well.
F. ...and the leaves and first circle
applied
They too, were hand painted before the background layer... So I now had all my detail work done, it was time to do the dark blue. (Fig I.) this was a simple "coloring" job, carefully painting around all the detail.. A semi transparent look was maintained to follow the lead of the picnic table.

G. Stencil for inside leaves and lemons.
Next plans were to let the paint stand for about three days and seal coat it. A real problem came at this time.  Although the manufacturer said that the paint did not need seal coating, I requested it and ordered a quart of their seal coating.  It did NOT work. It promptly bled the original artwork. Fortunately, I only
H. Even after two weeks of drying, the
clear coat "bled" the paint...
possibly a light spraying
or misting could have worked,
but brushes definitely not.
did a avery small sample, and was easily able to repair the damaged work..

I. All lemons, leaves and graphics are
now done, time to color in the
background
After contacting the manufactured a few times, they literally could not explain the circumstances, other than claim that the paint did not need seal coating in the first place..  The client, in the meantime filled and cleaned the fountain a few times and nicked the art work, therefore, I felt the seal coating was imperative.

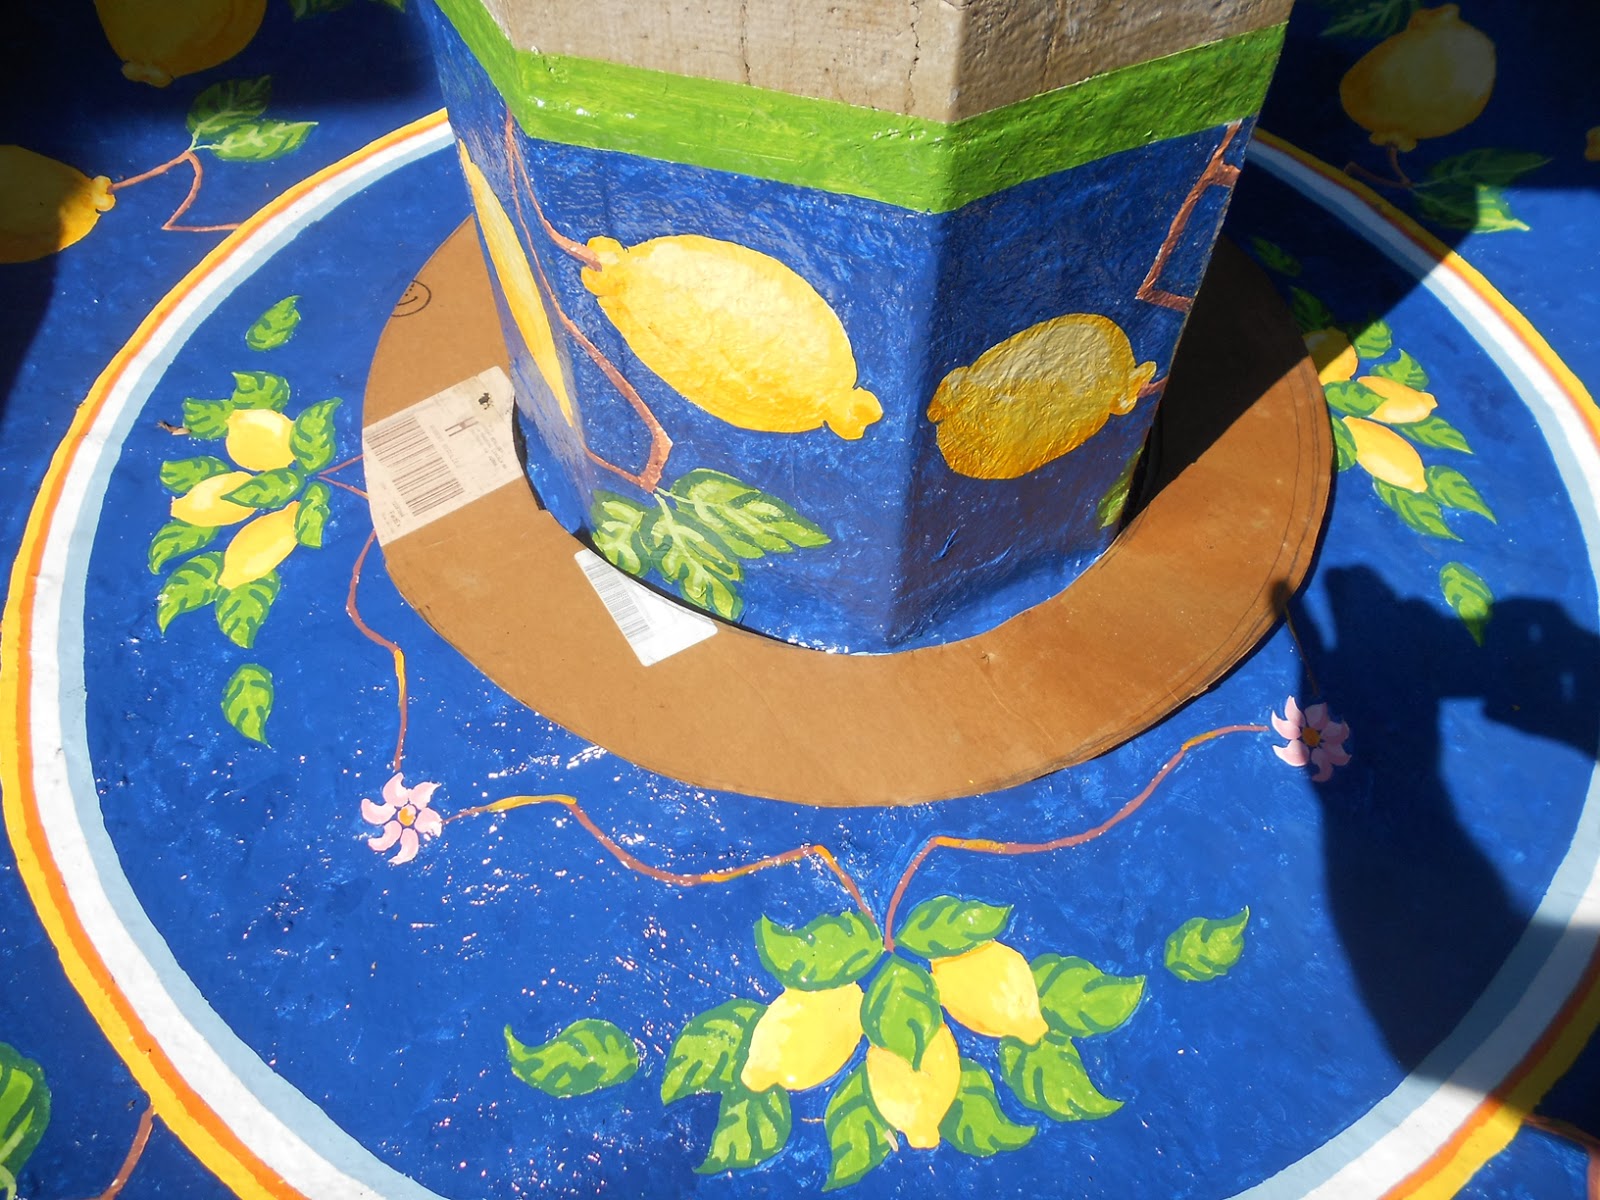
J. This is the collar that was made
to swing the circles within.
We are now two weeks after the completion of the job, thinking the paint needed that time to "Cure" I tried the seal coat once again on some samples I had set up(see fig H) .. same issue.. the paint bled...So much for the seal coating. But I did try a spraying Krylon Crystal clear on the paint, and had no adverse reactions. I called the manufactureere again, and they calimed now issues with crystal clear.

Our final step finally took place with numerous light coats of crystal clear sprayed onto the finished art, with a good 10 minutes drying time in between each coat.  Slowly the coatings built up to a nice glossy varnish- like finish.. I used to use crystal clear on paper comps back in college, and they are still standing well today, over 40 years later.. Figured its gotta be good for the fountain as well.

The job was now complete, and both myself and client are very satisfied.
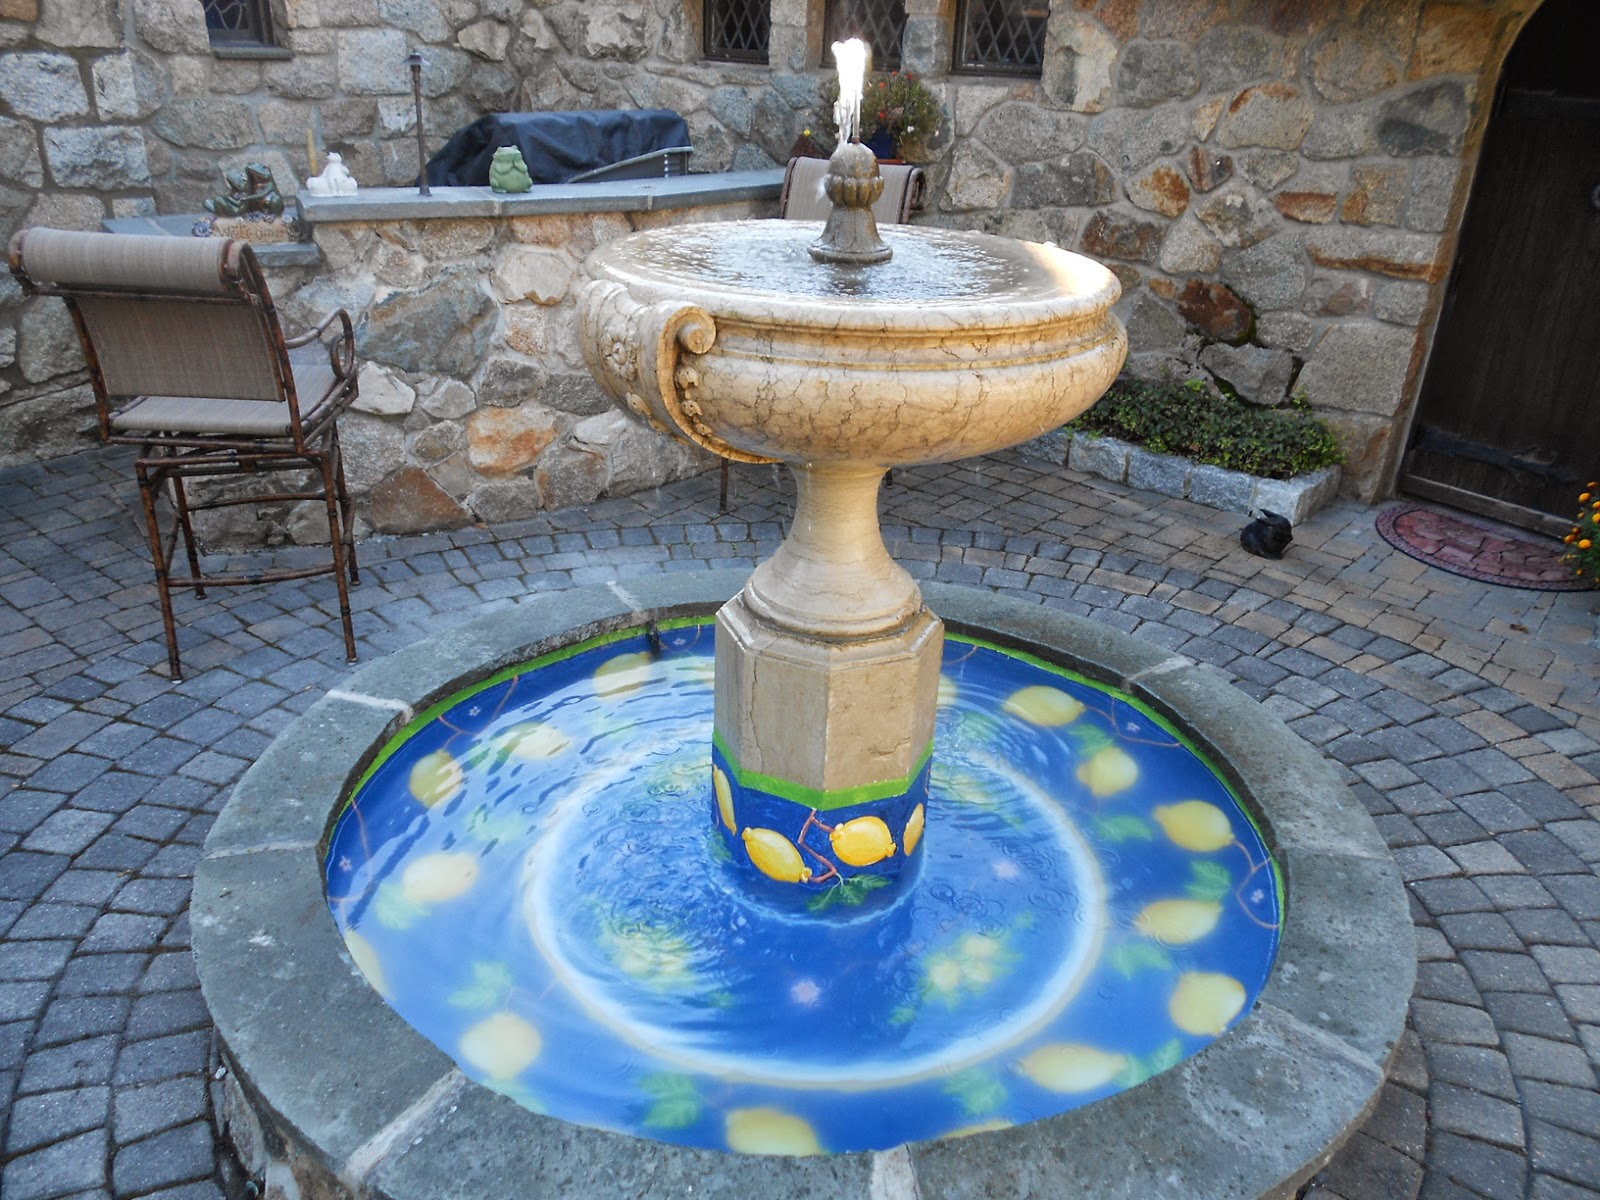
The final product filled and operational!


Wednesday, January 23, 2013

Robert Beaulieu oil Painting for South Street Gallery Open Spaces

During the month of February, The South Street Gallery in Hingham will be hosting paintings by South Shore Artist entitled Open Spaces.  Proceeds for this show will be used to benefit the Massachusetts Audubon Society.

I created an all new piece for this show, that I couldn't resist. Down in Stonington CT, for Thanksgiving at my brothers, I just couldn't resist the afternoon light that fell on his neighbors fields and farms.  The long shadows of late afternoon fall/winter light has always been one of my favorite subjects (see others on mywebsie.)...it makes for great compostion.

Anyhow, what is unique about this, I did the same scene about 12 years ago as shown here.  What's fun is how, as an artist, you are always developing, changing and sometimes maybe even improving(???).  I do like my newer direction, looser, by so much more colorful ( Paire school of Art always had us using brunt and raw umbers... I barely touch those now). Yet, interesting, there are still a basic core that I like about the first painting as well.  Of course, you can see how I use the the long highlight of the afternoon sun off in the fields, just the same as the newer one, and for instance this winter scene down the street from our home.

Eric Sloane, noted artist or rural landscapes, used this technique quite often, so I need to give credit where credit is due. Hope you enjoy thanks for taking a peek.


Daves Farm, Thanksgiving 2012, by Robert Beaulieu

During the month of February, The South Street Gallery in Hingham will be hosting paintings by South Shore Artist entitled Open Spaces.  Proceeds for this show will be used to benefit the Massachusetts Audubon Society.

Daves Farm, By Robert Beaulieu, 1994(?)
I created an all new piece for this show, that I couldn't resist. Down in Stonington CT, for Thanksgiving at my brothers, I just couldn't resist the afternoon light that fell on his neighbors fields and farms. The long shadows of late afternoon fall/winter light has always been one of my favorite subjects (see others on my website.)...it makes for great compostion.


Bound Brook, 2004(?)
by Robert Beaulieu
Anyhow, what is unique about this, I did the same scene about 12 years ago as shown here.  What's fun is how, as an artist, you are always developing, changing and sometimes maybe even improving(???).  I do like my newer direction, a bit looser, and so much more colorful ( Paire school of Art always had us using brunt and raw umbers, have gone to blues and purples for shadows... I barely touch the umbers now). Yet, interesting, there is  still a basic core that I like about the first painting as well.  Of course, you can see how I use the the long highlight of the afternoon sun off in the fields, just the same as the newer one, and for instance this winter scene down the street from our home.

Eric Sloane, noted artist or rural landscapes, used this technique quite often to make his paintings really zing, so I need to give credit where credit is due. Hope you enjoy thanks for taking a peek.